
Step-by-Step Guide to Cleaning Your Yamaha SR400 Carburetor
Proper carburetor cleaning is crucial for Yamaha SR400 maintenance. Start by safely removing the carburetor to avoid damage. Disconnect the fuel lines and throttle cables gently, ensuring all residual fuel is drained to prevent spills or hazards.
Next, disassemble the carburetor carefully. Begin with removing the float bowl, jets, and needle valve. Keep track of small parts to avoid loss or misplacement. Use essential tools such as screwdrivers, pliers, and a carburetor cleaning brush for detailed work.
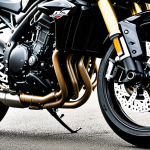
In parallel : Maximize Your Stopping Power: Enhance Your Triumph Street Triple with Premium Aftermarket Brake Pads!
For cleaning, soak metal components in a recommended carburetor cleaning solution. This effectively dissolves varnish and debris that impair fuel flow. Use compressed air or a fine wire to clear clogged jets without distorting their shape. Avoid harsh abrasives that could damage delicate surfaces.
During Yamaha SR400 maintenance, closely inspect parts for wear or damage. Cracks, corrosion, or warped sections necessitate replacement to restore proper function. Check the float’s integrity and needle valve for signs of sticking or wear, as these affect fuel metering.
Also to discover : Unlock Your Yamaha XT250’s Potential: The Definitive Handbook for Optimizing Carburetor Settings
Following this step-by-step cleaning method ensures your SR400 carburetor runs smoothly, enhancing overall engine performance and reliability.
Fine-Tuning Carburetor Adjustments for Optimal Performance
Fine-tuning the carburetor adjustment on your Yamaha SR400 is essential for achieving optimal engine performance. Start by setting the air-fuel mixture correctly. This balance ensures the engine receives the right amount of fuel relative to air, which directly affects combustion efficiency. If the mixture is too rich, expect black smoke and poor fuel economy; too lean, and you risk engine overheating and hesitation.
Next, adjust the idle speed screw. Proper idle speed prevents stalling and ensures smooth running when the engine is at rest. The ideal setting varies based on engine condition but generally ranges between 1200 and 1500 RPM. Use a tachometer for precise measurement.
Synchronizing all carburetor settings is vital, especially if you’ve cleaned or replaced parts during Yamaha SR400 maintenance. Incorrect synchronization can cause uneven engine response and reduced power output. Dealers recommend performing sync checks after adjustments and periodically during routine maintenance.
Use essential tools like screwdrivers and a reliable tachometer for precise adjustments. Many riders find that careful carburetor tuning markedly improves throttle response, fuel efficiency, and overall ride quality without costly repairs.
Troubleshooting Common Yamaha SR400 Carburetor Issues
Effective troubleshooting carburetor problems on the Yamaha SR400 starts with recognizing typical symptoms. Rough idling, poor acceleration, or difficulty starting often signal SR400 problems linked to fuel delivery or air mixture inconsistencies. To diagnose, begin by inspecting the fuel lines and filter for blockages or leaks. Clogged jets and a dirty float bowl frequently cause fuel flow interruptions, so check these components closely during carburetor cleaning.
Another common issue is a sticky choke mechanism, which can prevent proper cold starts. Make sure the choke moves smoothly and isn’t obstructed by dirt or corrosion. Adjusting the choke cable tension can also resolve starting difficulties.
If you’ve ruled out visible defects but symptoms persist, consider the needle valve and float condition. These regulate fuel level and any sticking or wear can severely impact performance.
Keep a toolkit ready with essential tools like screwdrivers, carburetor brushes, and compressed air to address minor issues yourself. However, persistent problems despite thorough Yamaha SR400 maintenance warrant professional service to avoid engine damage and ensure reliability.
Clear diagnostics combined with timely action restore smooth running and drive confidence in your Yamaha SR400’s carburetor system.
Step-by-Step Guide to Cleaning Your Yamaha SR400 Carburetor
Proper carburetor cleaning begins with safely removing the Yamaha SR400 carburetor. Start by turning off the fuel valve and draining residual fuel to avoid spills. Disconnect the fuel lines and throttle cables gently. Use essential tools such as screwdrivers and pliers carefully to prevent damage.
Once detached, disassemble the carburetor by removing the float bowl, jets, and needle valve. Keep all small parts organized to avoid loss. For effective cleaning, soak metal components in a quality carburetor cleaning solution designed specifically for varnish and debris removal.
Use a fine wire or compressed air to clear blocked jets, ensuring no damage or deformation occurs. Avoid harsh abrasives that can scratch internal surfaces. During this Yamaha SR400 maintenance phase, inspect parts closely for signs of wear—look for cracks, corrosion, or warped sections. The float and needle valve should move freely without sticking, as they control fuel flow precision.
Thorough cleaning using the right cleaning products and essential tools restores fuel passage efficiency, improving engine performance and reliability.
Step-by-Step Guide to Cleaning Your Yamaha SR400 Carburetor
To begin carburetor cleaning on your Yamaha SR400, ensure safety by turning off the fuel supply and draining any leftover fuel to prevent spills. Use essential tools such as screwdrivers and pliers to carefully remove the carburetor from the engine. Gently disconnect fuel lines and throttle cables without forcing, as damaging these could complicate reinstallation.
Once removed, disassemble the carburetor by separating the float bowl, jets, and needle valve. Organize all parts to avoid losing small components. For cleaning, soak metal parts in specialized cleaning products designed for carburetor varnish and grime. These solutions efficiently dissolve deposits that hinder fuel flow and performance. After soaking, use compressed air or a fine wire tool to clear clogged jets, maintaining their integrity to avoid damage.
During this phase of Yamaha SR400 maintenance, thoroughly inspect components for wear, corrosion, or any deformation. Check if the float and needle valve move freely without sticking, as these affect precise fuel metering. Address or replace any damaged parts promptly. By combining proper techniques with high-quality cleaning products and essential tools, your carburetor will maintain reliable function and enhance your SR400’s overall engine performance.